A Stratux AHRS image for beta testers
I am excited to finally offer a Stratux image for anyone who would like to help beta test my initial AHRS solution!
Requirements
To use this image, in addition to the normal Stratux requriements, you’ll need to connect an MPU-9250 sensor to your Stratux. The OpenFlightSolutions AHRS board is a great choice. You can also use a RY836AI (tested), a SparkFun MPU9250 breakout board (not yet tested), XINY MPU9250 BMP280 (not yet tested) or your own home brew.
The code also has a driver for the BMP280, which also exists on the OpenFlightSolutions AHRS board, the RY836AI and the XINY. If you have one of these boards or a separate dev board, the pressure altitude and rate of climb will be used in the algorithm.
RY835AI Not Currently Supported
If there is sufficient demand, I will support the MPU-9150 also (which is the sensor chip on the RY835AI). This would require writing a pure Go driver. The MPU-9250 performs better anyway. The same is true of the BMP-180 (RY835AI) vs the BMP-280 (RY836AI).
Download
You can download the image from the Releases page of the GitHub project page. Just burn it like any other Stratux image.
Differences from Stock Stratux Image
This image is based on the stock Stratux image stratux-v1.2r1-9ee46170ff.img.zip downloaded from stratux.me. I had to make a few changes: 1. /root/stratux points to https://github.com/westphae/stratux rather than https://github.com/cyoung/stratux. 2. I re-enabled dhcpcd so that developers can connect to it via a wired connection for downloading data, updating, etc. 3. I added my ssh public key for root access.
Sensor Pinout
Pinouts for the MPU-9250 are as follows:
| MPU-9250 Pin | Raspberry Pi Pin |
|---|---|
| VDD | Pin 01 |
| GND | Pin 06 |
| FSYNC | Pin 09 |
| SDA1 | Pin 03 |
| SCL1 | Pin 05 |
The Raspberry Pi also has ground on pins 14, 20, 25, 30, and 39 that you can connect GND or FSYNC to.
If you use the RY836AI, you can also connect its GPS:
| GPS Pin | Raspberry Pi Pin |
|---|---|
| TXD | Pin 10 (RXD0) |
| RXD | Pin 08 (TXD0) |
With the RY836AI, you should also connect its VDD to Pin 02 or 04 (5V) instead of 01 (3.3V).
Be sure to affix the sensor firmly to the Stratux box. The sensor must not be able to move around in flight or the AHRS will give false indications.
Changes to Stratux
Once you’ve connected the board and burned the image to your SDCard, you’re ready to go.
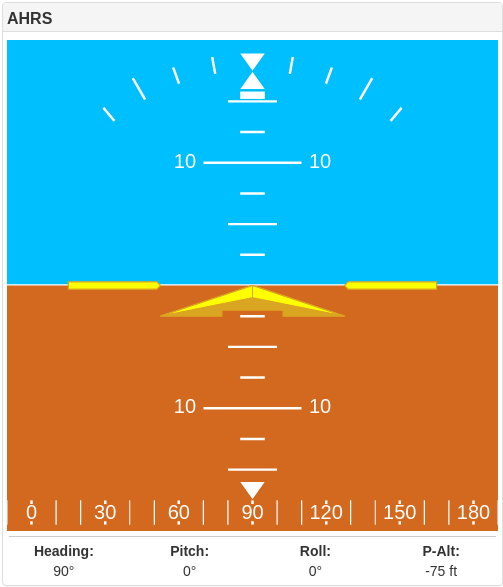
There are just a few changes to cyoung/stratux. First is a new Attitude Indicator in place of the old “paper airplane.” Tilting the sensor should result in some motion of the AI, though possibly not in a way that makes sense – because we haven’t calibrated it yet.
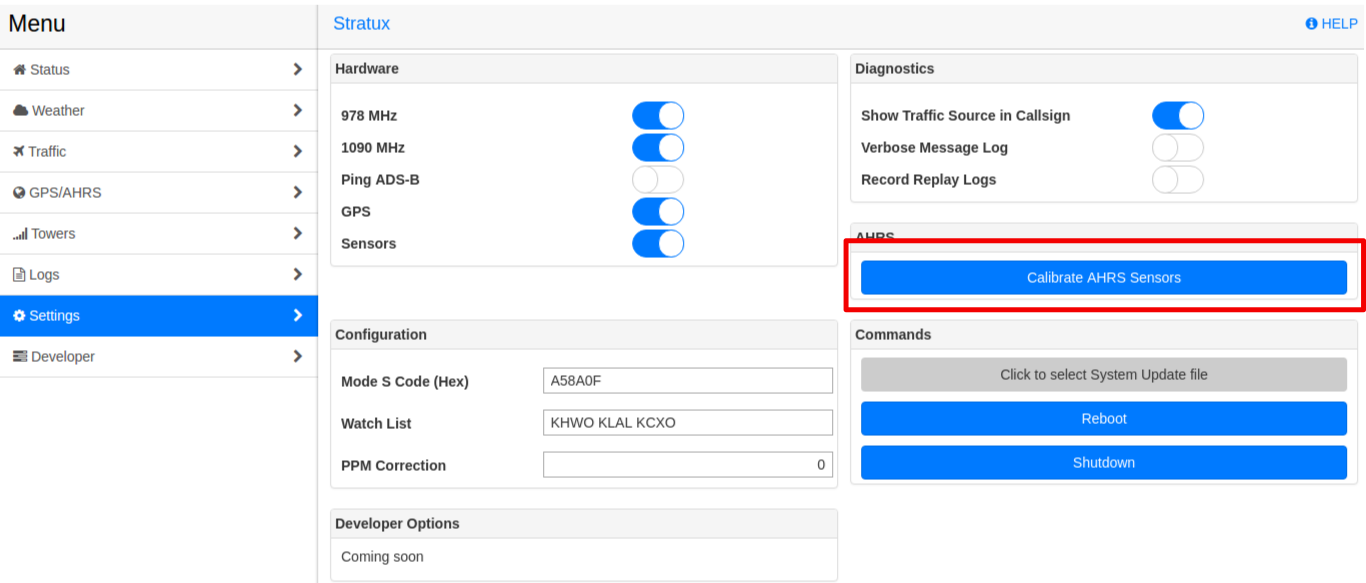
This is done via a “Calibrate AHRS Sensors” button on the “Settings” page.
I also added a “CPU Load” area to the “Status” page.
Finally, there are “Attitude Sensor” and “Altitude Sensor” switches on the “Settings” page. If your Attitude Indicator doesn’t respond when you move the sensor, be sure that these switches are on!
Stratux Startup
When this fork of Stratux is first started, it tries to connect to the sensors and, once successful, performs a separate “calibration.” The purpose of this calibration is to determine a preliminary zero value for the gyro and accelerometer.
It is very important when doing this calibration that the sensor remain fairly still. It is usually OK for it to be sitting on the glareshield with the engine running, though at these early (beta release) stages it might be better to start the Stratux up and ensure it is operating before starting the engine. It will not calibrate if the sensor is waved around or wiggling too much.
You will know that the sensor is calibrated when the heading on the attitude indicator swerves to show 90 degrees. Then you can pick up the sensor, wave it around and see how the attitude indicator responds.
Sensor Orientation
As noted earlier, it is crucial that the sensor remain in one position in your aircraft–if it slides around or wiggles, it will lose orientation. OpenFlightSolutions has a really nice base with a grippy bottom surface for their OpenFlightBox that works great for me. The OpenFlightBox AHRS board also affixes very firmly to the Raspberry Pi, so there is no chance for wiggling. With another sensor like a RY836AI, a XINY, etc. it is important to firmly affix the sensor to the case, Raspberry Pi, or something else so that it does not wiggle.
In this initial release, the Stratux will need to be oriented roughly at “right angles” to the pitch, yaw and roll axes of the airplane, so give some thought to how it will be situated in your aircraft. It can sit in any orientation as long as one of the sensor’s X, Y, or Z axes (positive or negative) points forward, one toward the left wing, and one up. I put mine on my glareshield with the antennae at the rear–see the picture.
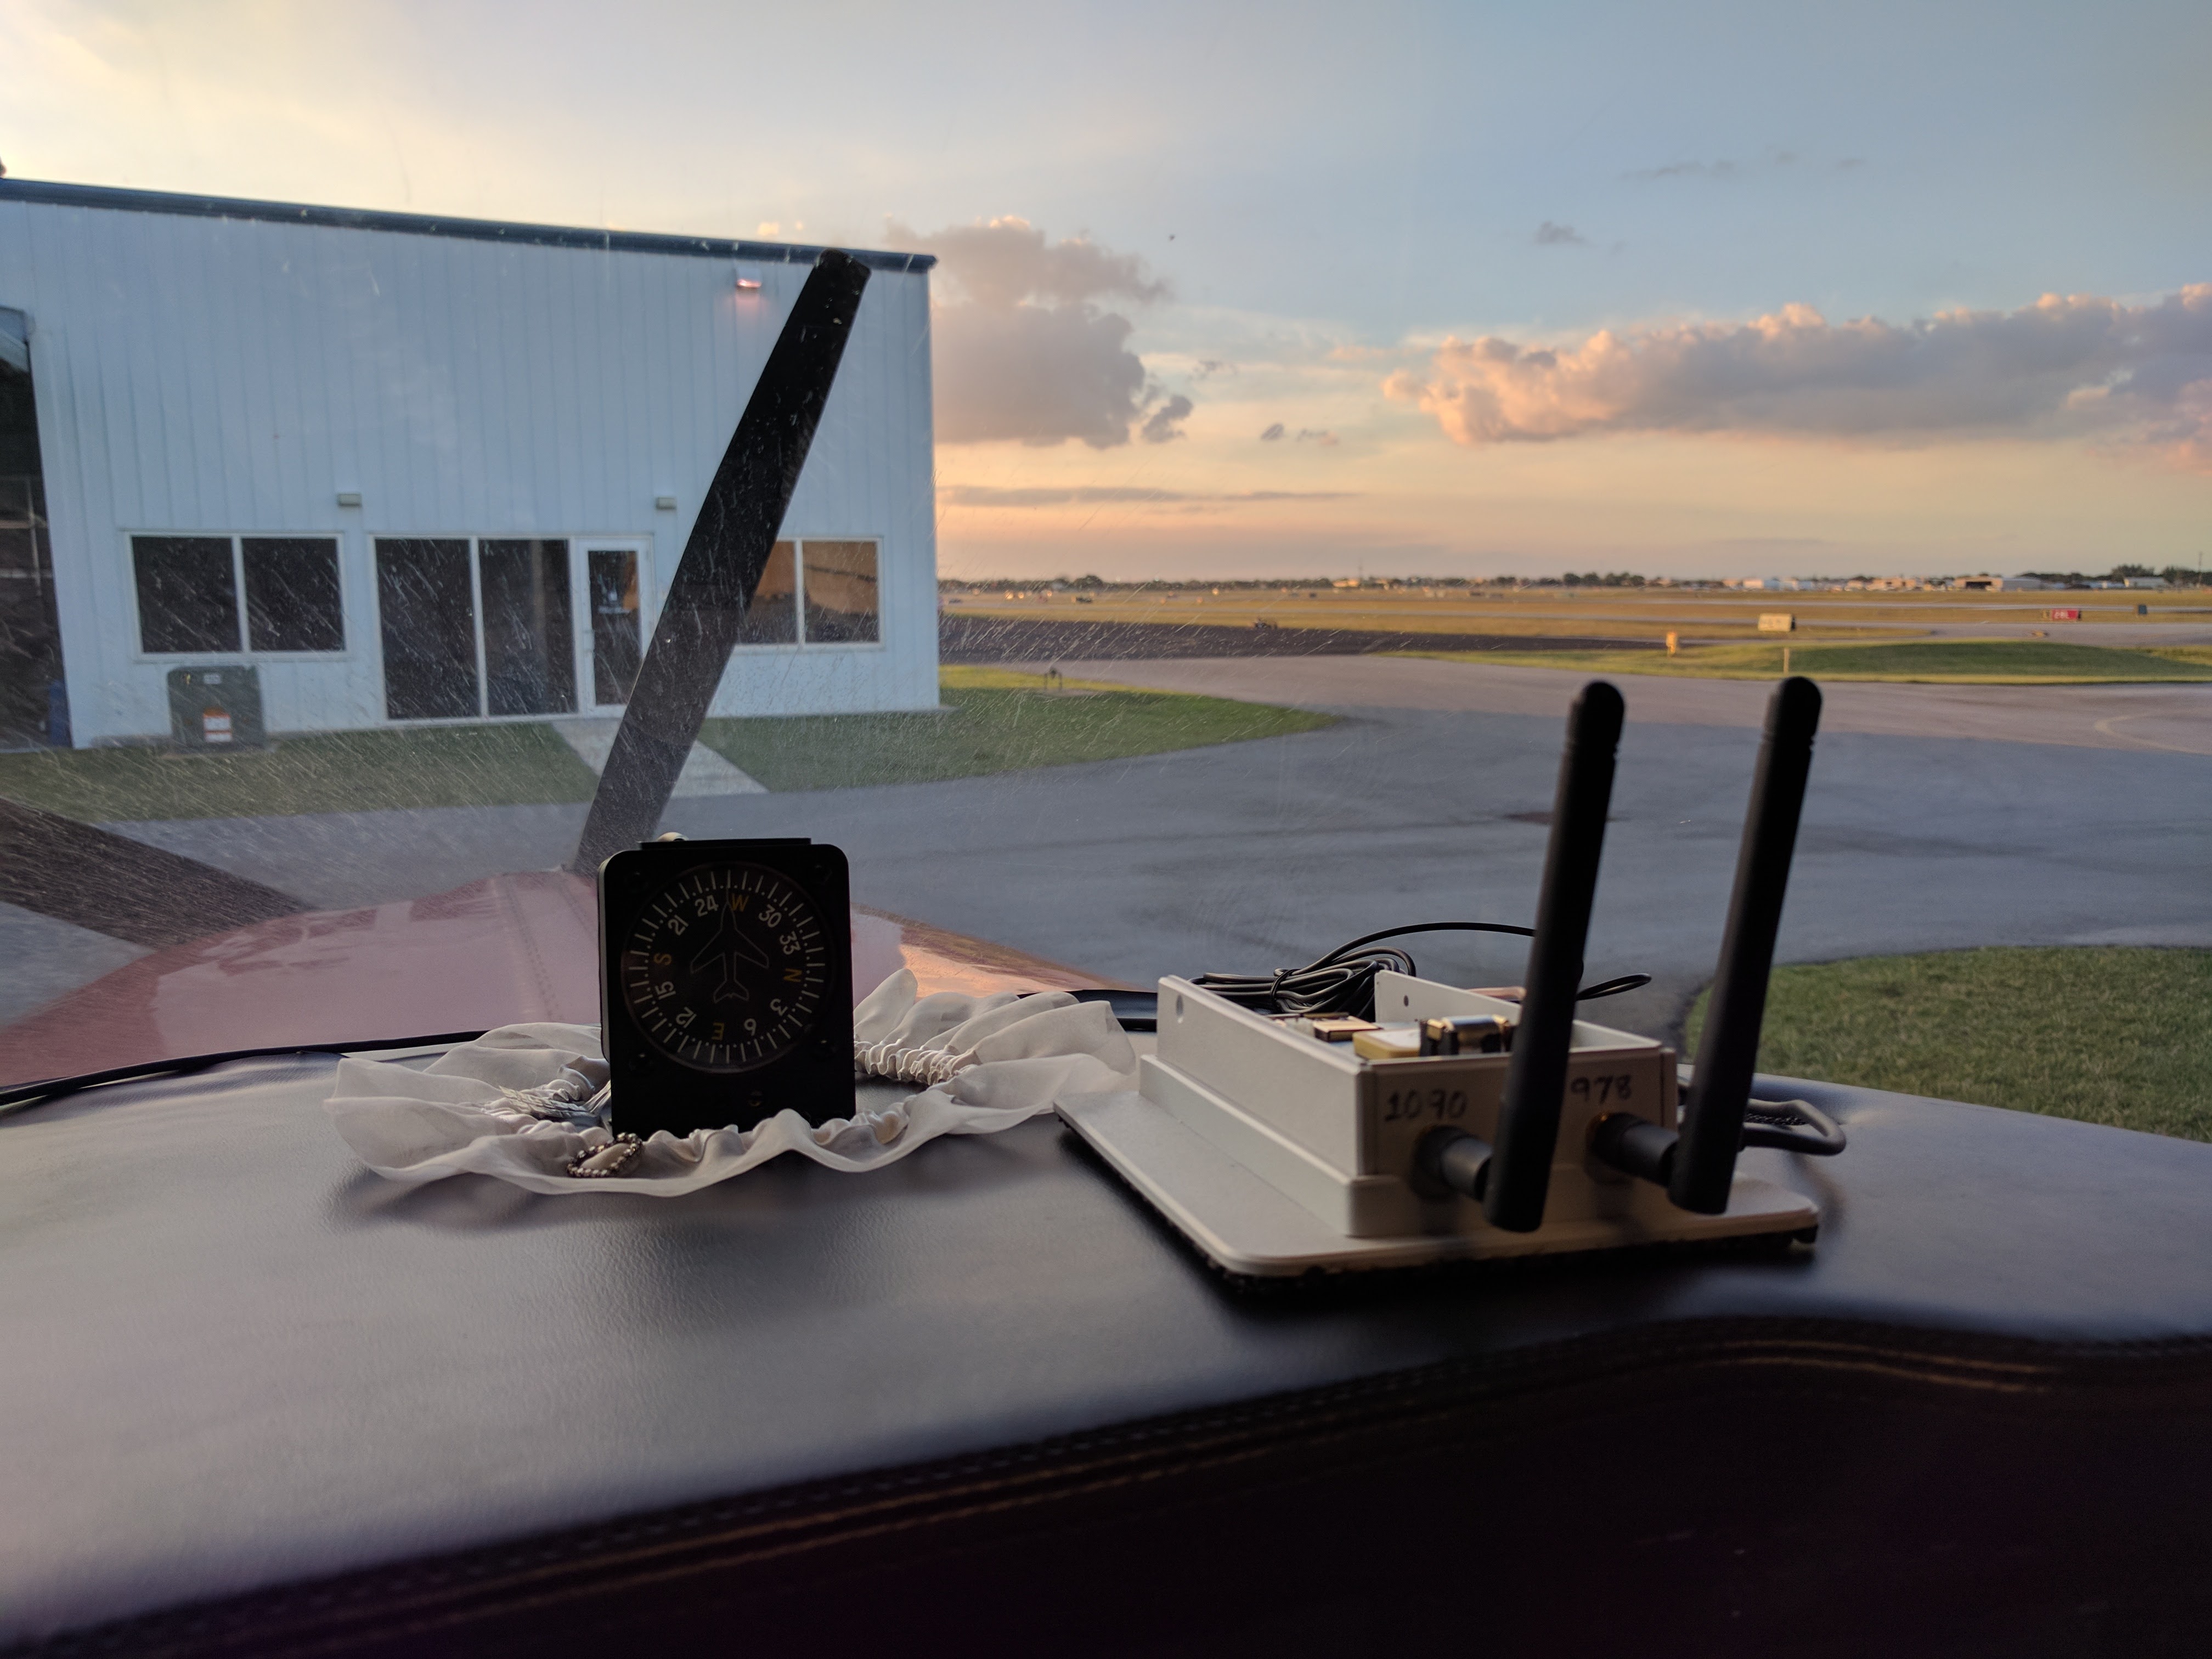
It will need to be oriented to within say 5° of the airplane’s axes to provide good data to the algorithm. Eventually I may write a more sophisticated self-calibration routine that will orient itself automatically from any which angle, but for now we need to tell it precisely which direction is which.
Sensor Calibration
Orientation Dialog Boxes have Changed
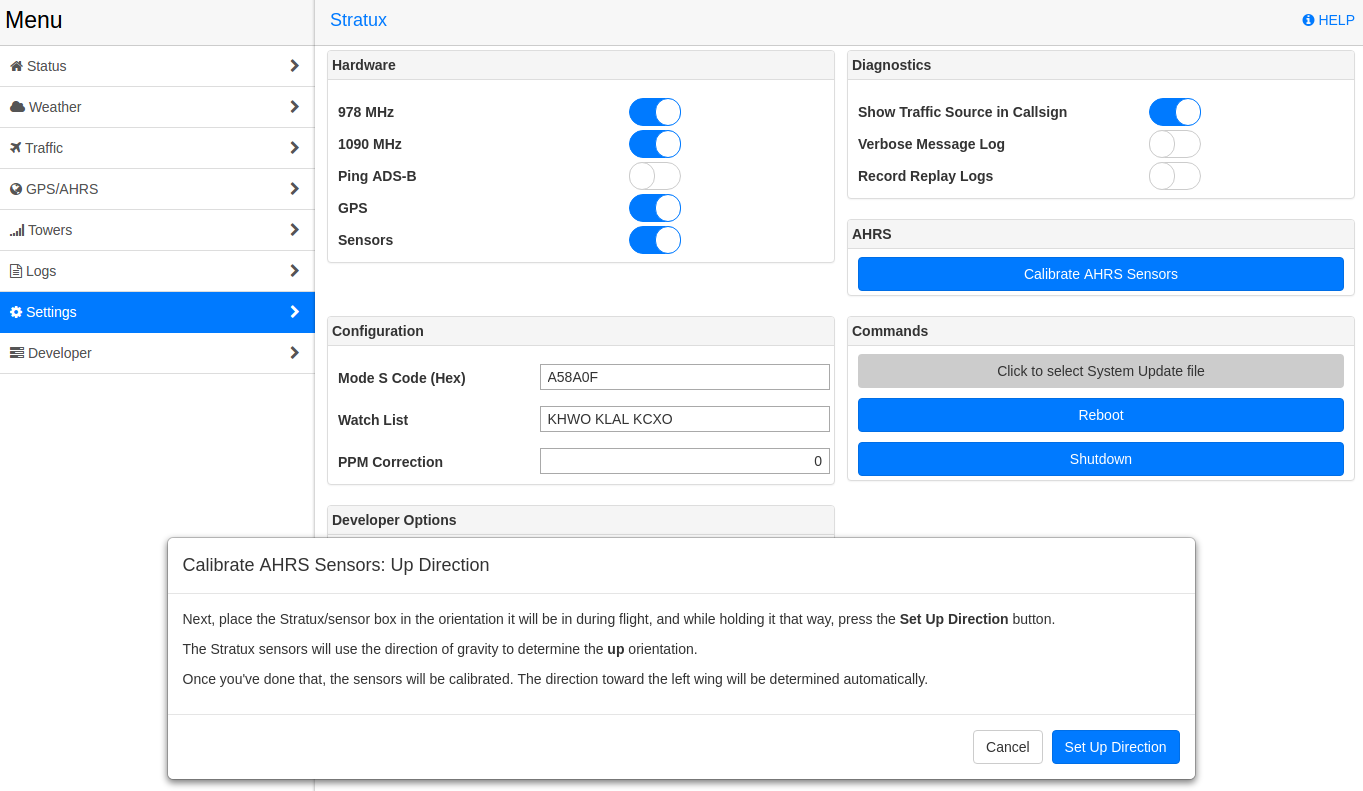
The screenshots below are from an earlier version of the software. The button name changed from “Calibrate AHRS Sensors” to “Set AHRS Sensor Orientation” and the dialog boxes are smaller to fit on a small (phone) screen. The procedure remains the same, however.
Now we will perform a “calibration.” This is not a full sensor calibration, it is just a means to tell the AHRS algorithm the orientation of the Stratux box in the airplane, i.e. which sensor axis corresponds to which aircraft axis. It needs to know which end of the sensor will point forward (along the roll axis), which end will point up (along the yaw axis), and which toward the left wing (along the pitch axis). This only has to be done once, as long as you don’t change this gross orientation of the sensor to your airplane. The setting will be stored with your other settings on your SDCard. It goes without saying that this is best done on the ground, with the engine off…
The calibration routine uses gravity to tell the algorithm which way is which. On the Settings page, if you click on “Set AHRS Sensor Orientation”, it will guide you through this process.
Once you click this button, you will first orient the sensor so that the end that will be pointing forward in flight is instead pointing straight up.
“Straight” just means that it is pointing up more than the other two axes, say a pitch angle of 70° or more.
Then the axis which feels the most gravity will be considered “forward.”
Once you are holding the sensor in this attitude, “nose-up,” then click the “Set Forward Direction” button.
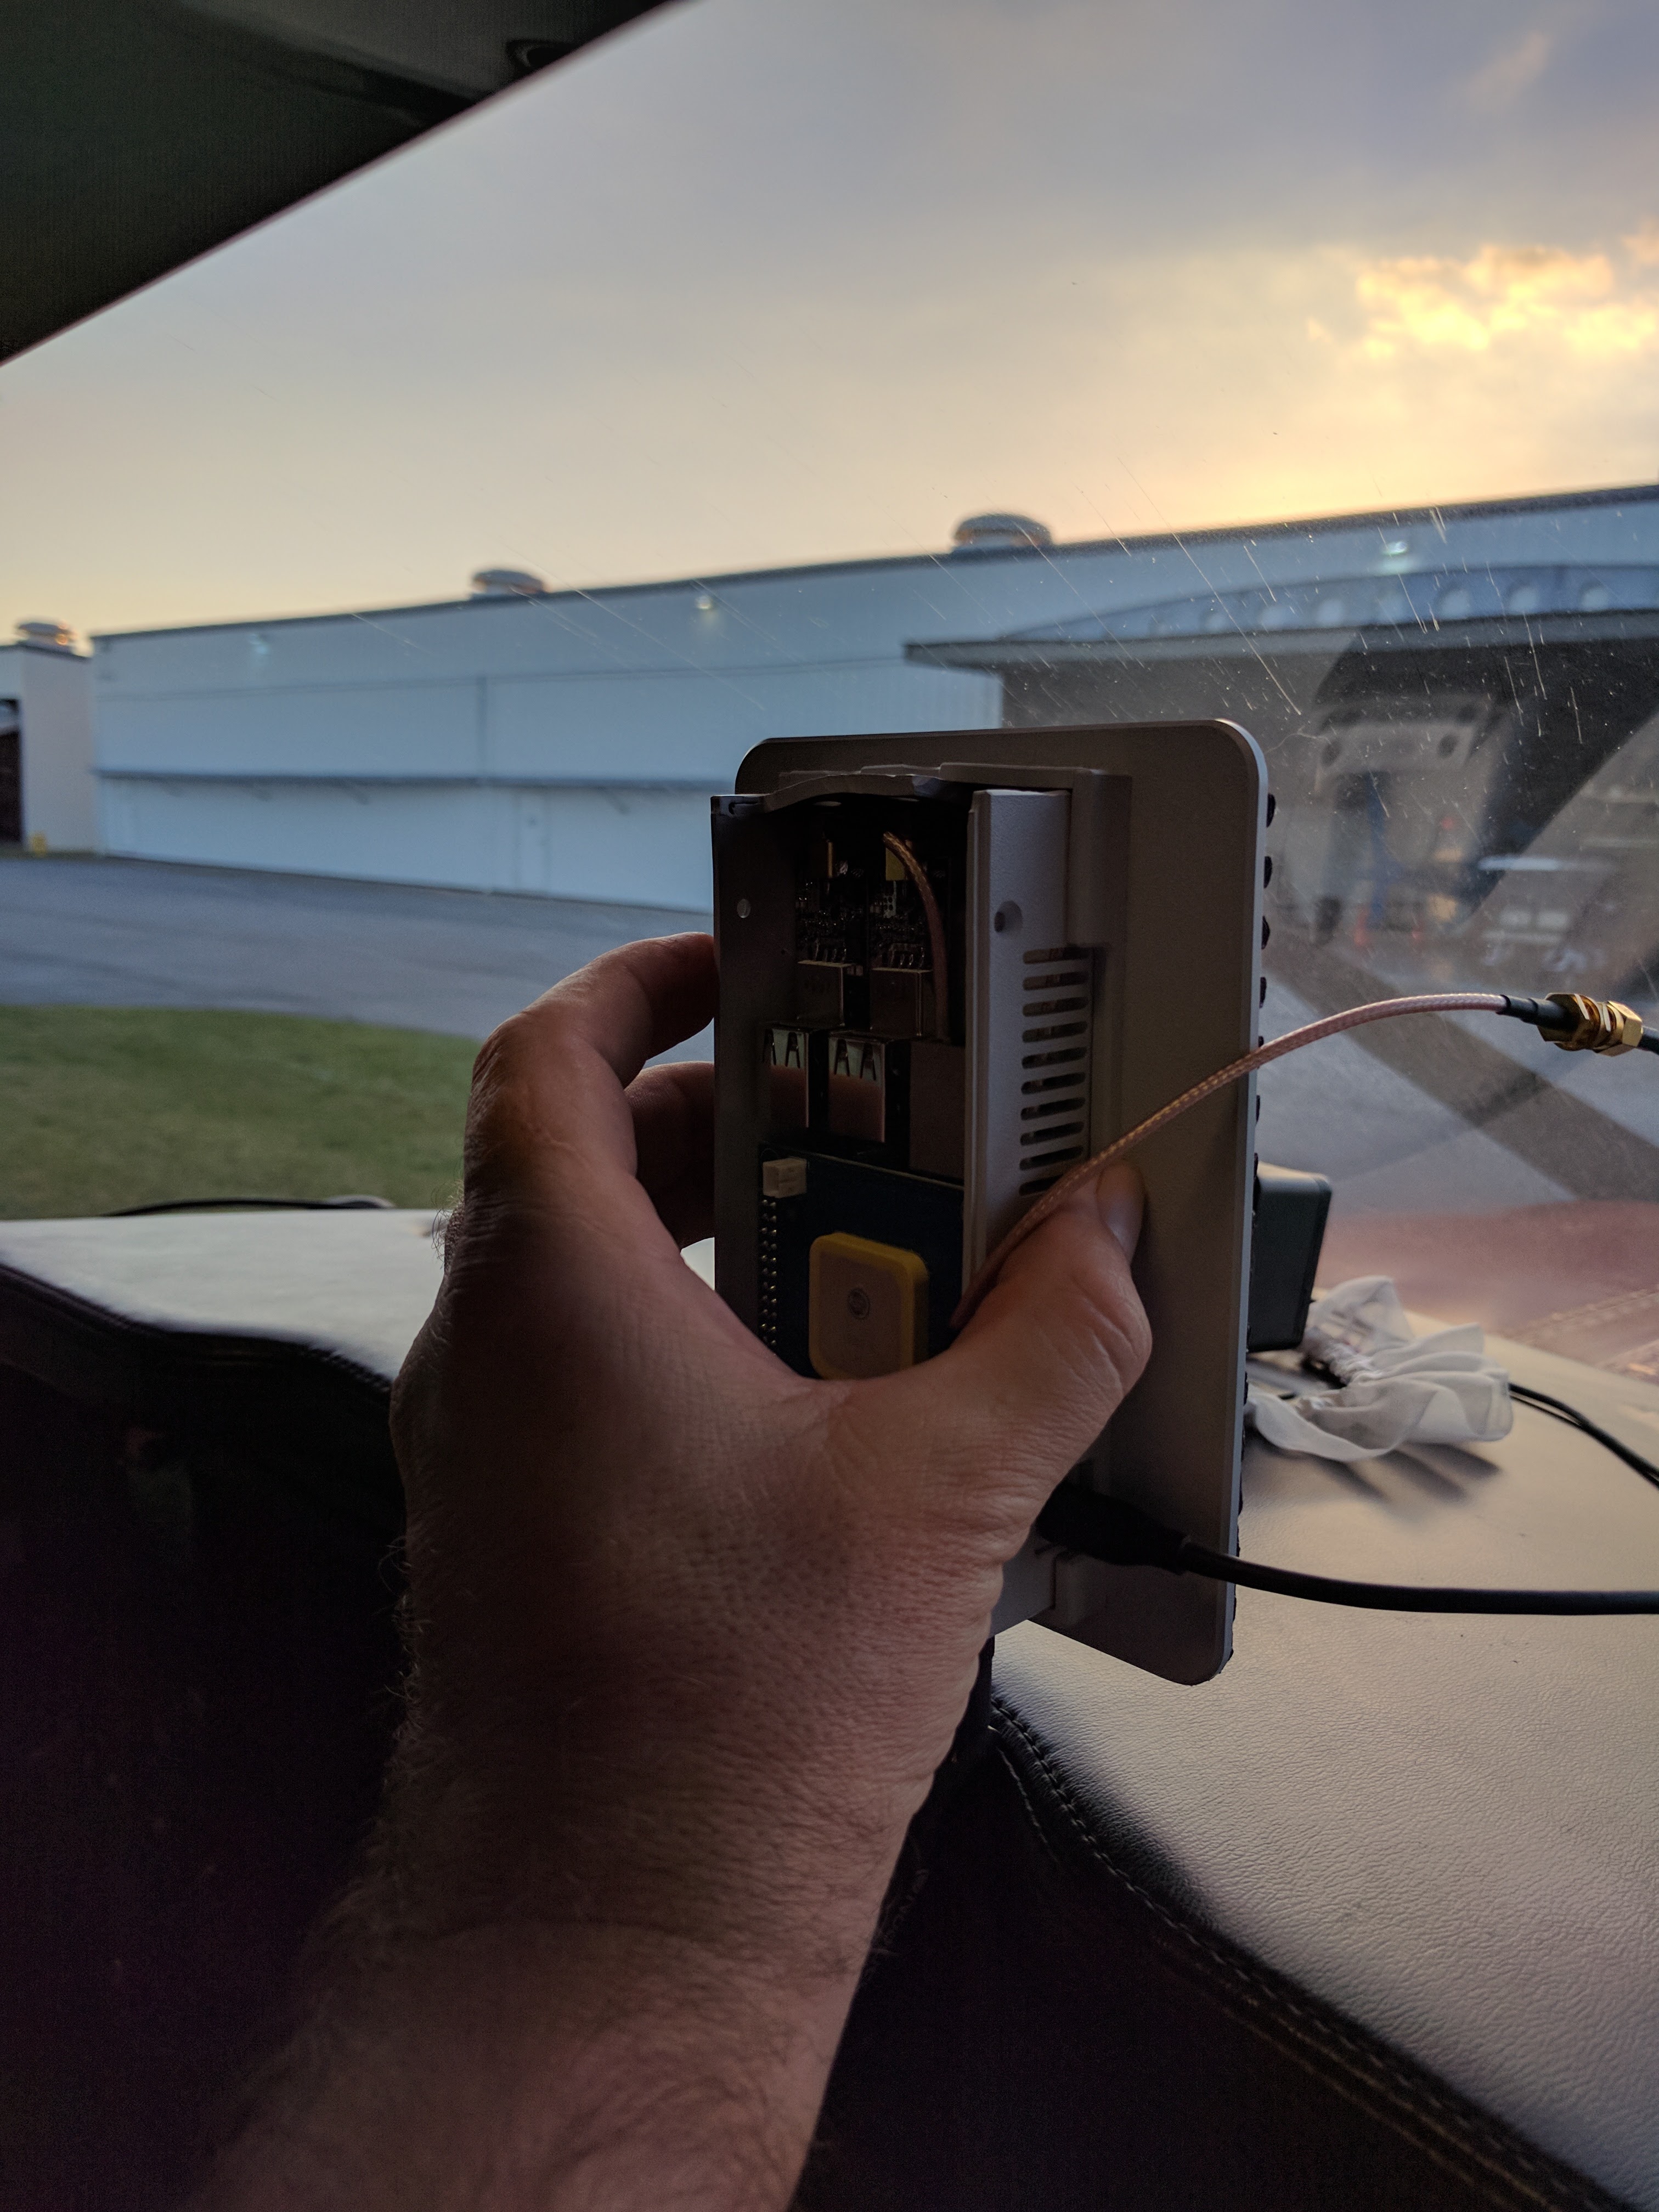
Now you just place the sensor in the orientation it will ultimately rest in the airplane.
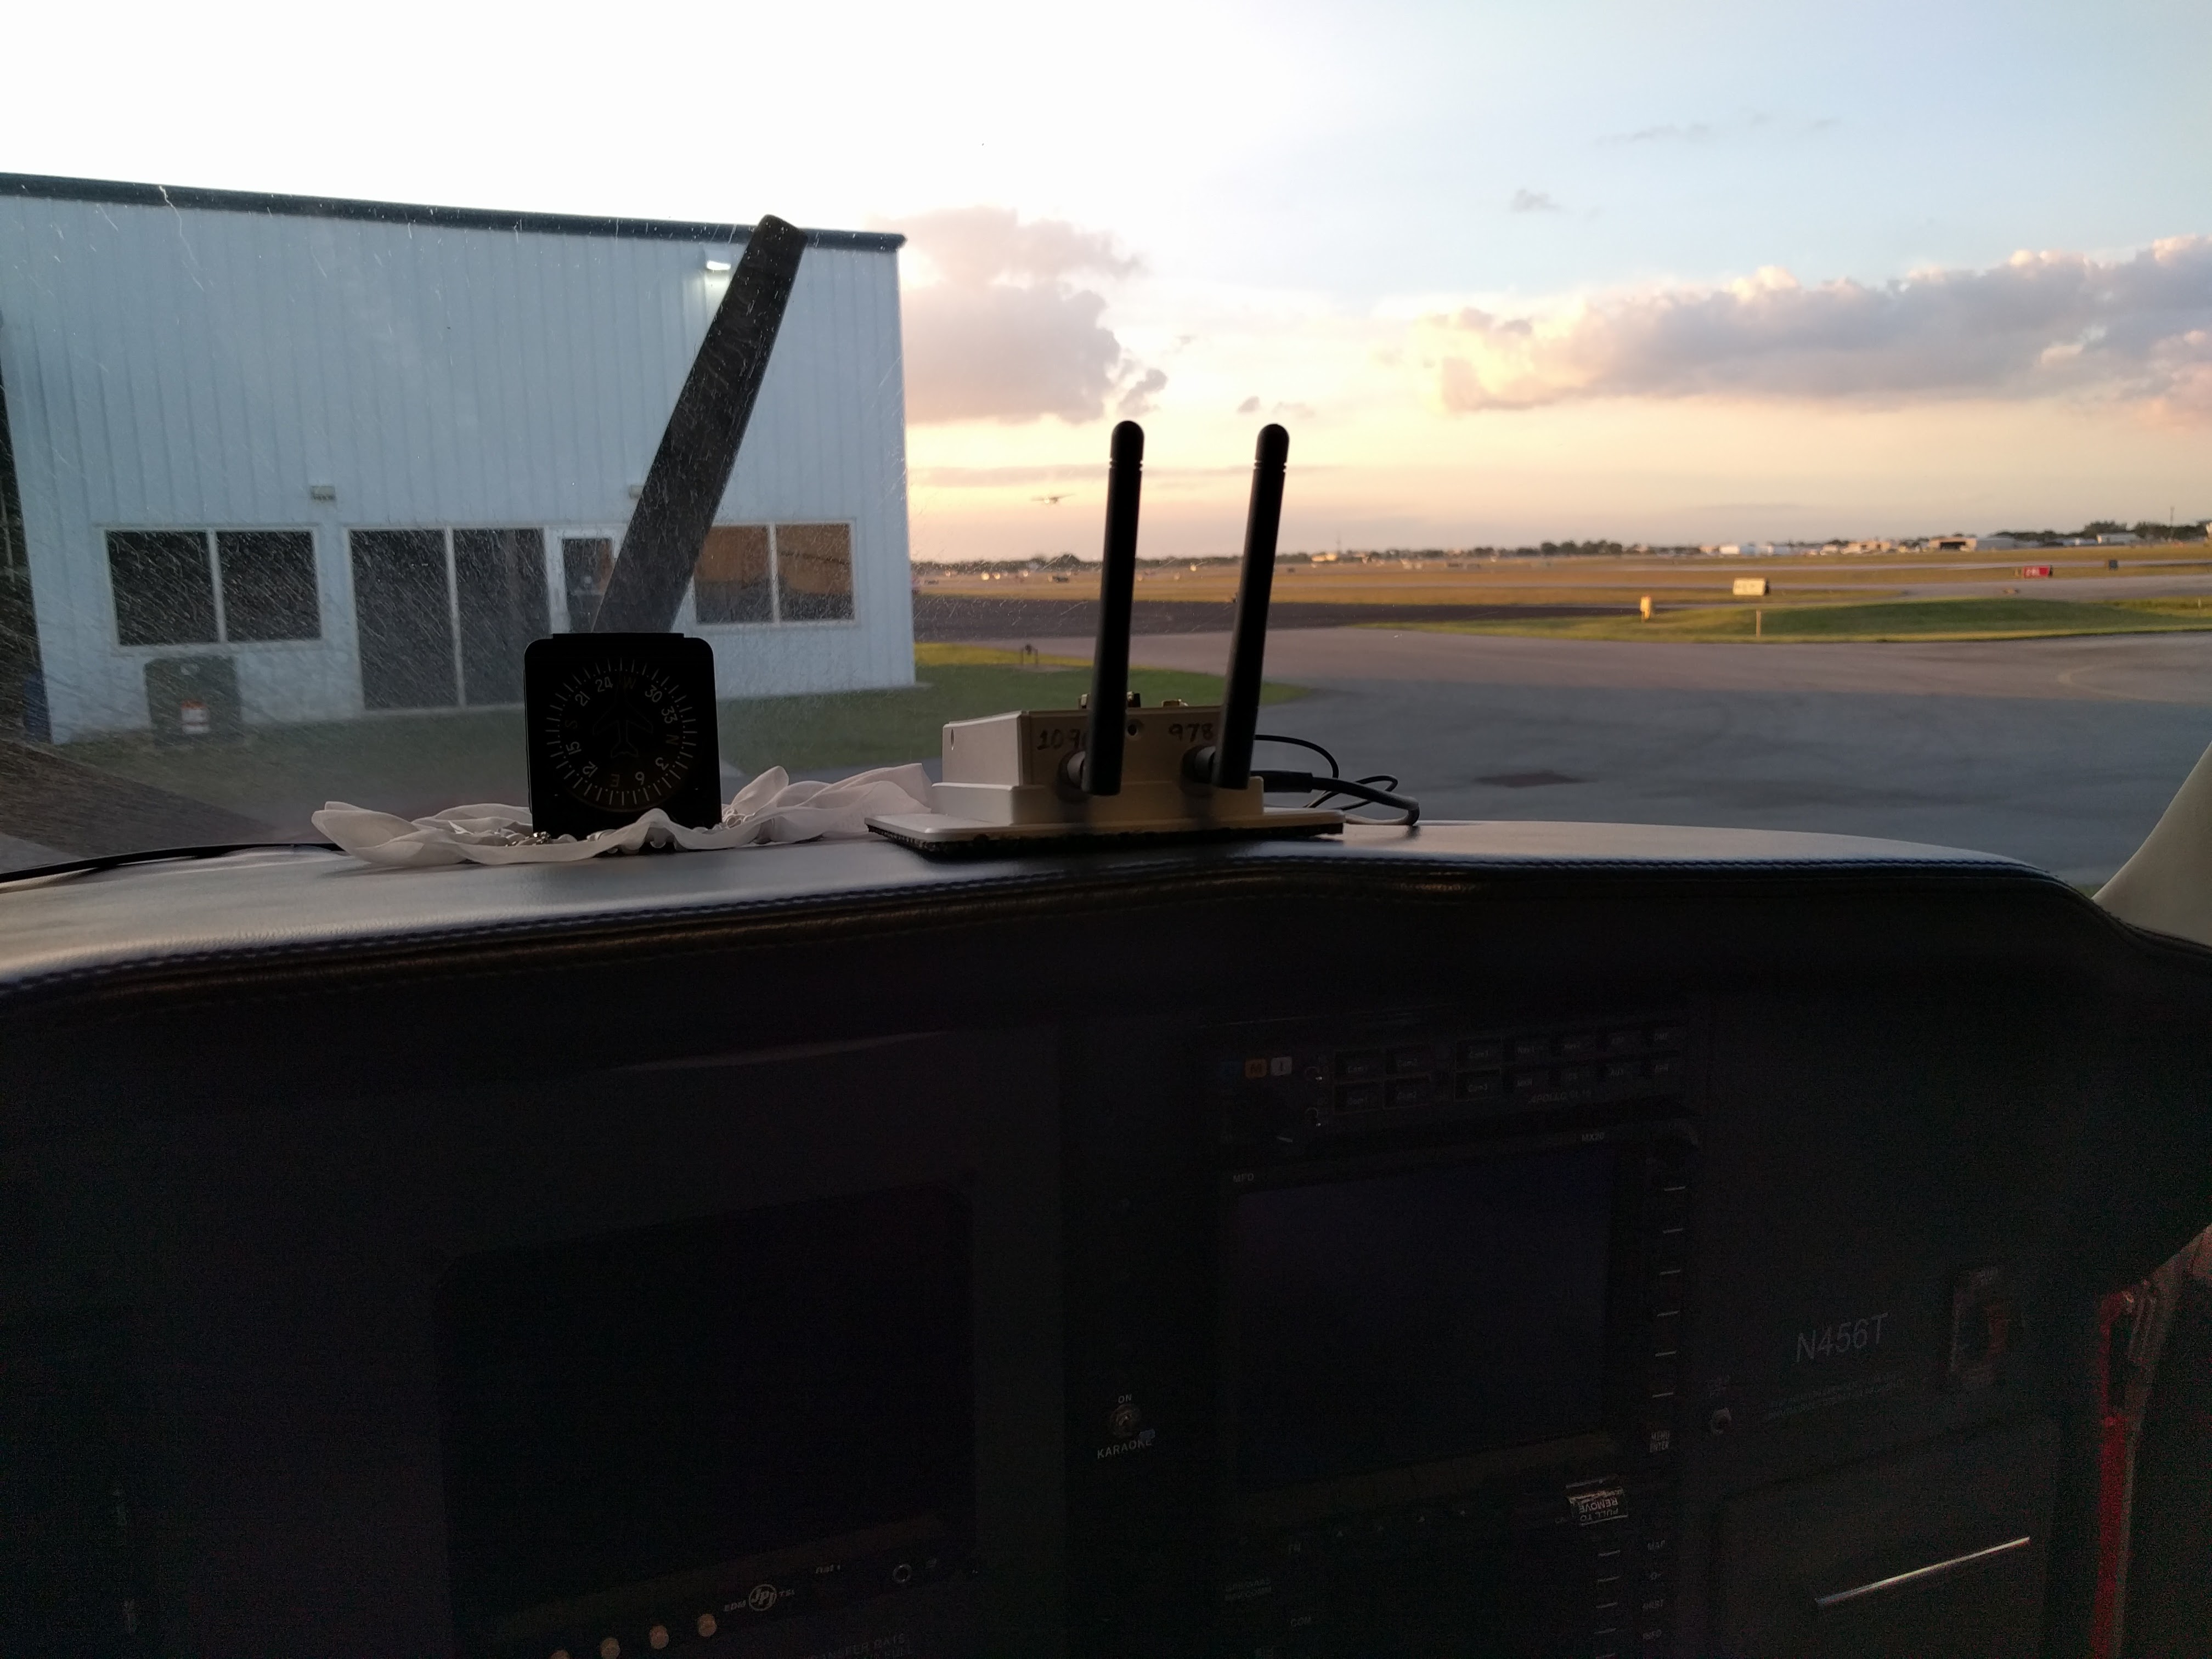
Then click the “Set Up Direction” button and gravity will tell the algorithm which direction will be Up.
From this, we can calculate which direction will be toward the left wing, so there is no need to tell the algorithm this.
You’re now ready to fly!
GPS-Only Attitude
There is already a “GPS-only” attitude system recently integrated into Stratux. This was developed by @AvSquirrel. It is considered a “pseudo-attitude” system because it does not use independent sensors to determine attitude–it bases its attitude calculations only on GPS data.
It is excellent code and works quite well. However, because it doesn’t have sensors, it has several deficiencies. Most notably, its attitude lags the aircraft’s actual attitude by a second or so; and it cannot correctly sense uncoordinated maneuvers.
I retained this excellent code for users who do not have attitude sensors, which presumably will be the majority. My fork will use the GPS-only attitude if there is no sensor present, or if the “Sensors” switch in the Hardware section of the Settings page is “off.” Otherwise, it uses my AHRS calculations.
Disclaimer
This AHRS will not save your life.
I was partially motivated to develop this software due to losing my vacuum pump-driven attitude indicator system (including standby pump within an hour each time!) no less than three times over the course of 2700 hours of flying. The last time, at night over the Egyptian Saharan desert, I at least had a clear sky above (there was oftentimes not a single light in the desert below). My autopilot was also driven by the attitude indicator, so I had to both keep upright and hand-fly through the pitch black for hours.
Fortunately, this last time I also had a MidCon LifeSaver electrical backup. Even surrounded by inky blackness above and below, with no horizon visible outside, between the stars above and the MidCon certified backup, I was able to continue without any loss of situational awareness. However, the thought crossed my mind many times as I flew on through the dark for hours that the MidCon was my last and only backup. If I had to do an instrument approach, I would be partial panel. I would really have loved to have had at least one potential additional and fully independent backup system, if only to provide me some comfort and an independent check for my partial panel flying.
It goes without saying that a self-built attitude indicator system that can potentially be thrown willy nilly up on the glareshield, in a severely uncontrolled environment, and running software that has never been certified by any independent agent should not be relied upon in any but the most dire of circumstances. Even then, you would be very wise to fly partial panel on certified instruments and use any such system as this only as a cross-reference.
If this software ever serves just to provide some comfort to a pilot in an event such as I experienced, it will have served its purpose. Its purpose is not to save your life.

